
A few nights ago I was trying to figure out what to wear to work the next day.
Sometimes it is such a tedious task!
Why can't I just have everything from the J. Crew catalog?
After going through a few different options I came to the
conclusion that my outfit needed a little something extra...

AHA! A headband of course!
So, let's see what you need to make one for yourself!
Supplies:

1. Hot glue gun (& extra glue just in case!)
2. Thread
3. Needle
4. Scissors
Materials:

1. Fabric of your choice
2. Felt in a coordinating color
3. A plain headband
Instructions:
1. Take the felt and cut out the shape of your choice. You will need to
cut out 2 of the same shape. The first one will be used for the base of your
fabric flowers and the second will be used to hide the underside of the first.

2. You will need to cut out approximately (26) 2" squares from
your fabric. These will be used to make the fabric flowers. You can use
as many or as little fabric flowers as you want to get the look you want!

3. Cut the corners of your fabric squares so that your squares have rounded corners.
It doesn't have t be perfect!
Like so...

4. Take one fabric square and pinch the center like this:

5. Take a second fabric square and pinch it over the first fabric square.
Now you'll have two fabric squares pinched giving it a layered look.

6. Taking your needle and thread, run it through the pinched portion of your
fabric flower so that is stays in place. I ran mine through 2-3 times per flower.

7. After you've repeated steps 4 - 6 with all of your fabric squares
you will now need to attach each fabric flower to one of the
pieces of felt. Use your needle & thread to do so...


8. After you've attached each flower to the first piece of felt you will
need to hot glue the underside of the felt to your headband. It helps
if you figure out exactly where you want the flower bunch to be placed
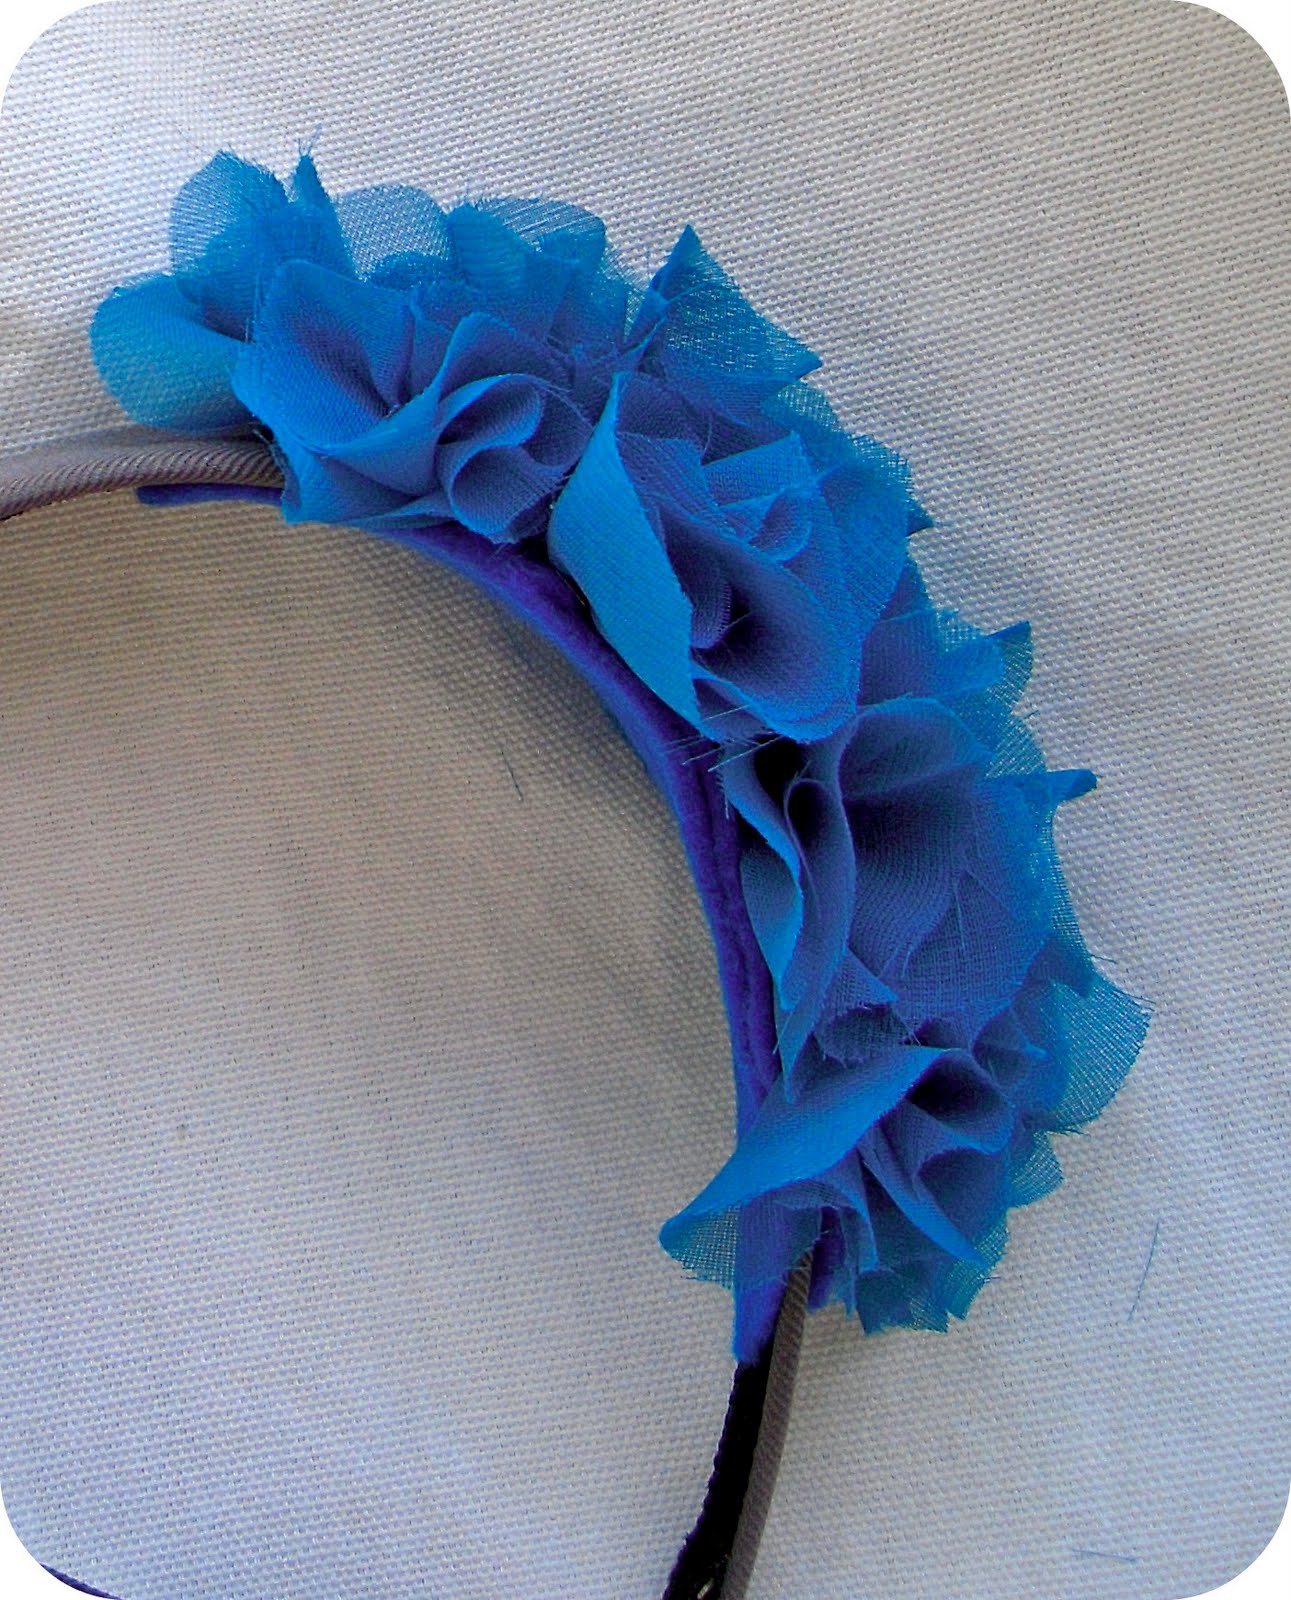
before you actually start glueing! Then attach the second felt piece as shown:

And you're done!
Now, how easy was that?!?!


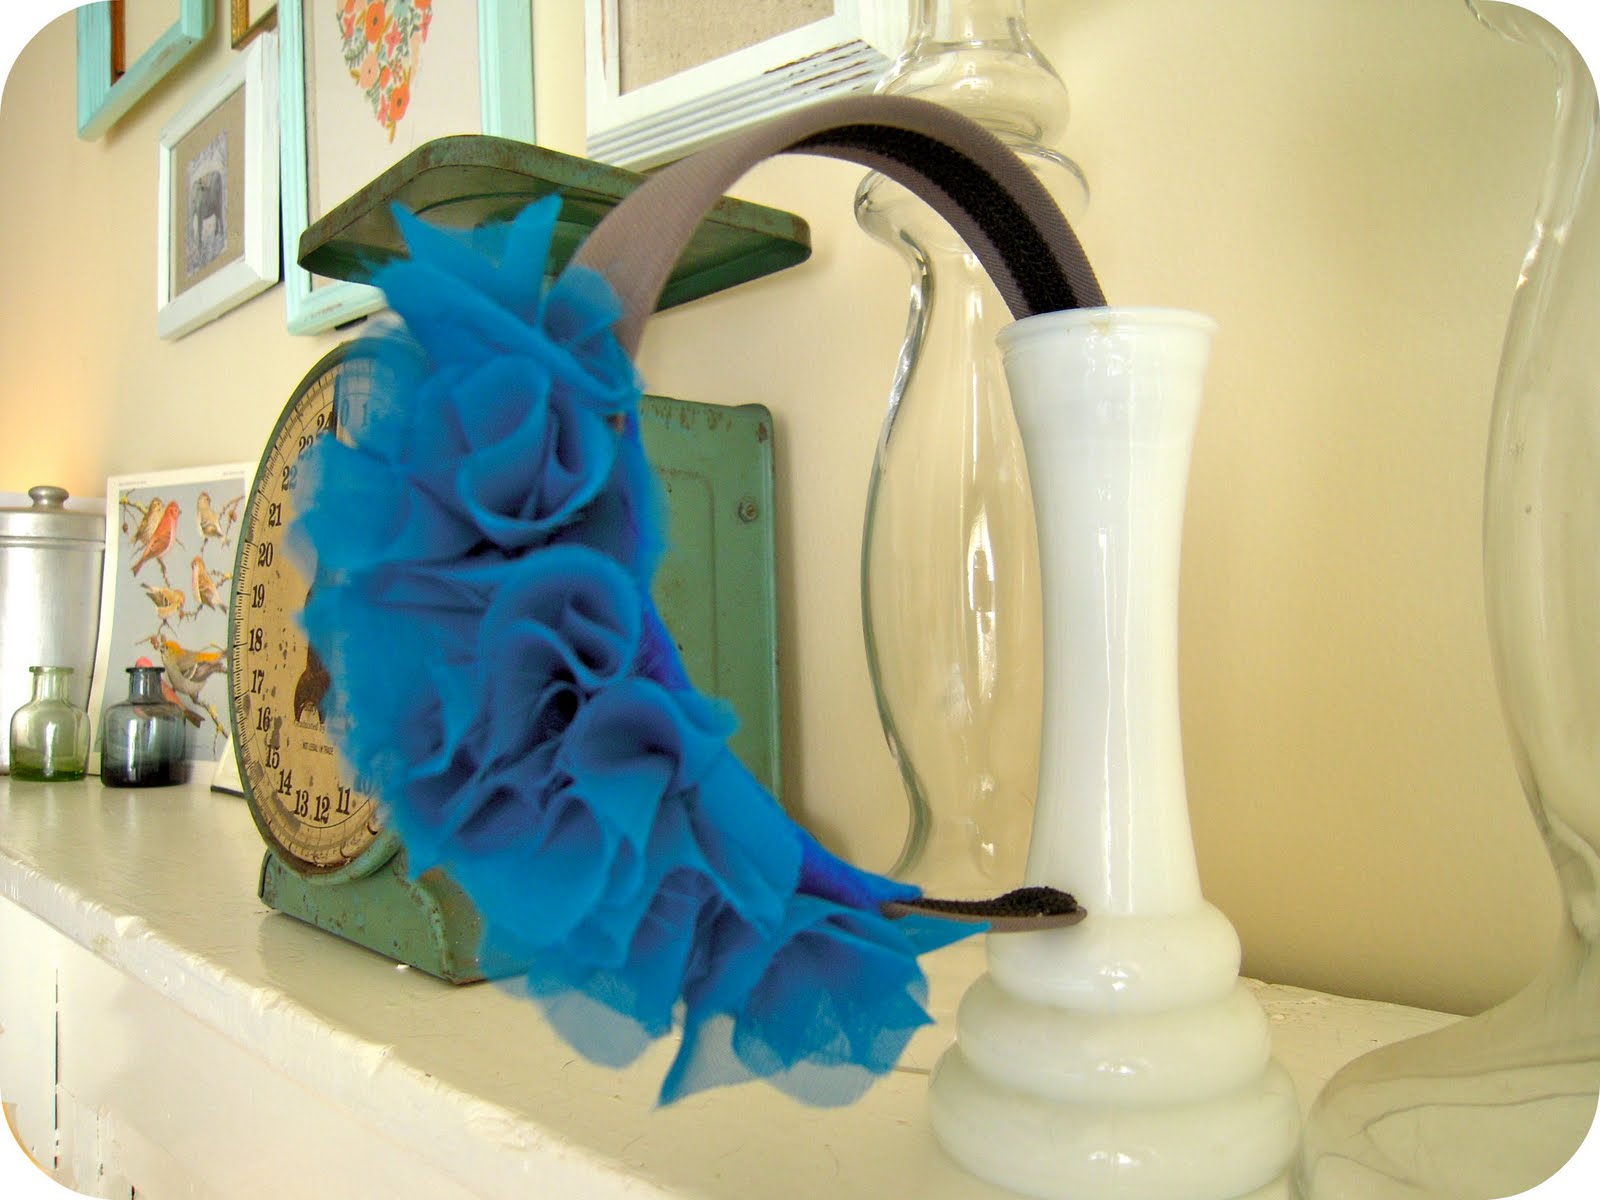
I hope you all enjoyed this tutorial!
If you do this tutorial please send me pictures! I'd love to see your work!
Tomorrow? DIY Jewelry Holder!
Happy Tuesday! :)


Kelley this is so stinkin cute!!! I love the ruffles. I need one. Badly. ;)
ReplyDeleteADORABLE!! What a lovely tutorial, and I LOVE the color you chose!
ReplyDeleteps- I tagged you on my blog :]
This is so cute! Thanks for the tutorial and the nice comments!
ReplyDeleteI love the style of this tutorial. Excited to read more! Stopping by from NFF.
ReplyDelete-Polly
www.learnandgopollyco.blogspot.com
I am a new follower - and I will be trying this headband this week! I love it!
ReplyDeleteThanks for telling me how to do it myself!! :)
Emily
www.familyandlifeinlv.com
Oh my goodness this is so cute! I will definitely be trying it out (: I just love headbands. And the blue color you chose is FABULOUS
ReplyDeleteVery creative. Love the color. I'm such a blue girl.
ReplyDeleteI wanted to let you know about Atticmag's new linky party - Giveaway Friday! It's a convenient place for bloggers to link their giveaways each week. We've kicked it off with a fantastic giveaway of our own. Five lucky winners will win material to do a backsplash in their homes. Hope to see you there!
Allison
Atticmag
GREAT tutorial! I love the color. Did you have fun wearing it? It looks like it would be fun to wear! ;)
ReplyDeleteThank you for joining my Friday link party! Hope to see you back next week!
so cute,,,waooooooooo
ReplyDeleteSoooo pretty!! I will definitely be adding this to my “to-do list”. Thanks for this wonderful tutorial!
ReplyDelete