Pages

Showing posts with label diy. Show all posts

Tuesday, April 22, 2014

New Adventure!

Y'all can now find me over at the new blog my friend Maeci and I started called Zelda + Madeline!


Aptly named after our pups, of course.

I'll still occasionally post over here, but majority of the posting will be happening over there.  We'll be doing a lot of the same kind of stuff I've posted about in the past: DIYs, decor ideas and tips, fashion, recipes, etc. We've already got an AWESOME DIY that Maeci made, so be sure to check it out!

You can also find us on Twitter and Facebook!


Monday, January 28, 2013

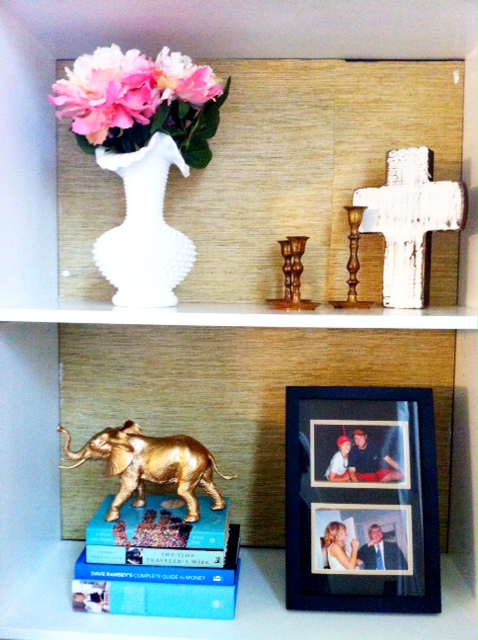
DIY Gold Elephant

Happy Monday!  These metallic toy animals have been making their way around the blogosphere and I couldn't pass up making one for our bookcase when I saw this gray toy elephant (Roll Tide!) in the checkout aisle at Joann's...


It seemed like an easy project (and it is!), so I scooped up my supplies and went to town!

Here's what you'll need:


  • 1 plastic toy animal
  • white primer spray paint
  • metallic gold spray paint
  • clear acrylic sealer


Instructions:

Begin by priming the toy on all sides.  I found it best to put the toy on its back and spray with primer.  Then once that has dried, turn the toy on one side, then the other and finally place it in the standing position making sure that it is dry in between movements.  Once you have done one coat of primer, repeat the previous steps with a second coat of primer.

Repeat the application process with the gold spray paint, doing two coats.

Repeat the application process with the clear acrylic sealer, doing just one coat.  Let it dry completely and you're done!


I'm sure this sweet little elephant will enjoy moving around the house every month when I compulsively redecorate.  He looks like the type that likes to travel.


Here's to hoping this week isn't as hectic as last week!

Thursday, January 24, 2013

Before + After: Gossip Bench


As a wedding gift, my grandmother gave us this antique gossip bench she got at an antique auction near their South Georgia home.  I love the color of the wood and how unique this piece is - and not to mention how I will always think of my grandmother when I look at it.  The only thing that needed a little updating was the fabric on the seat.  It was a weird faux leather with a floral pattern.


This was an easy fix and a quick update!  I picked up some fabric from Joann's (that I was originally going to use on our dining room chairs - more on that later...) and went to work.  This is how the little darling looks now...


It's the perfect addition to this little corner in our house.  I'm sure I'll change up the fabric again at some point, but for now I'm really liking this pop of red ikat!  Here is a closer look at the fabric...


Recovering the seat of a chair or ottoman is an easy way to bring new life to a piece of furniture and it's cheap!
The DIY bug must have bit me this weekend because I did a few more projects around the house and can't wait to share them with y'all!  Have you guys been up to any fun DIY's?

Tuesday, December 11, 2012

DIY Wooden Name Sign


A few weeks ago I decided to paint a sign for our foyer to give it a more personal touch.  A few years ago I made a sign for my sweet friend Miranda, but never got around to making one for myself!  So, a lazy Saturday presented itself and I drug out the paint and went to town.

Here is what you will need:

  • Piece of wood or an old sign you want to repaint
  • 2 color of acrylic paint (or any paint will do)
  • Paint brushes
  • Computer and printer
  • Ball point pen
  • Wood stain (optional - I didn't use it on this piece)

Let's get started...

Sand the piece of wood and dust off sanded remnants.  Paint the wood a solid color.  I used a premixed gray acrylic paint I found at Hobby Lobby.  You may need to do two coats depending on your paint color.  Let it dry completely.

While the paint is drying, print out the letters needed in the font you'd like on your computer.  Place them on the wood where you'd like the wording and trace the outline with a ballpoint pen, pressing down a bit to make an imprint on the wood.

Paint the traced letters with your second paint color.  You may need to do two coats (I did!).  Let that dry and then enjoy your finished work!  If you want a more antique look, try using a wood stain on top of the completely dry paint (I've used Minwax Provincial 211 in the past).  Wipe the stain on, let it sit for a few minutes and then wipe it off.  Ta-da!


This would be a great gift for a friend or newly married couple!  Simple and heartfelt  :)  Hope everyone is having a wonderful week!

Wednesday, July 18, 2012

DIY Monogrammed Coasters


Happy Wednesday!  I am so excited to share this DIY with you all!  Let's get down to the nitty gritty...

Supplies:


  • Bathroom or kitchen tiles (found these at $3.95 for 9 tiles, but there are definitely cheaper ones out there)
  • Mod Podge
  • Clear Acrylic Sealer (I used Krylon's Crystal Clear in the gloss finish)
  • Paper and a color printer (or you can use scrapbook paper)
  • Sponge brush
  • Felt rounds
Step 1:  Measure your tiles and determine how large you would like the paper to be.  My tiles measured 4" X 4" so I made each of the monogrammed papers approximately 3.5" X 3.5".  I found fabric online and simply saved the image - ta-da!  Then I just put my monogram on top of the picture.  I chose 3 prints and printed off 3 copies of each.  Cut the paper to the appropriate size and set aside.


Step 2:  With the sponge brush, brush on one coat of Mod Podge.  Place the monogrammed paper on top and gently smooth your fingers over it with a very small amount of pressure.  Let it dry completely for at least 30 minutes.


Step 3:  Brush on 3 coats of Mod Podge over the monogrammed paper, allowing it to dry completely between each application.


Step 4:  After the Mod Podge has dried, apply one to two coats of the clear acrylic sealer.  After the sealer has dried, apply the felt rounds to each corner.


Step 5:  Voila!  You're done!  Let them dry over night and tomorrow you can enjoy your new coasters!


This has got to be one of the easiest DIY's I've done and it was inexpensive to boot!  This would be perfect as a house warming gift, Christmas gift or even a birthday present.  Hope y'all enjoy it!  It was a fun, simple and the end product was lovely!

Monday, July 16, 2012

Pillow Talk

Recently, I've been searching for some new pillows for our master bedroom, guest bedroom and the living room.  That's pretty much all of the rooms in our home.


Adding pillows to a bed or sofa is an easy easy way to add color or pattern without making a huge investment.  And if you come to a point where you aren't loving the way a room looks - punch it up with some new pillows!  Mix it up with different patterns, colors, sizes and shapes.  It adds dimension and keeps your eye moving around the room creating visual interest.


Another pillow trend I love (although, it's always in trend in the South) is having monogrammed pillows.  They are the perfect personal stamp to a bedroom, living room or any other space on your home.  They seem to add something different than a patterned pillow.


via houzz


I love being able to switch out one aspect in a room to give it new look and feel!


TIP: A trick I like to use to give my home a new feel is collecting all of the pillows in every room.  Bring them all to one location and put them in new rooms.  It doesn't work for all of the pillows, but can lead to you using an element in one room that you may not have considered before.  Enjoy!

Monday, January 23, 2012

Reupholstering?


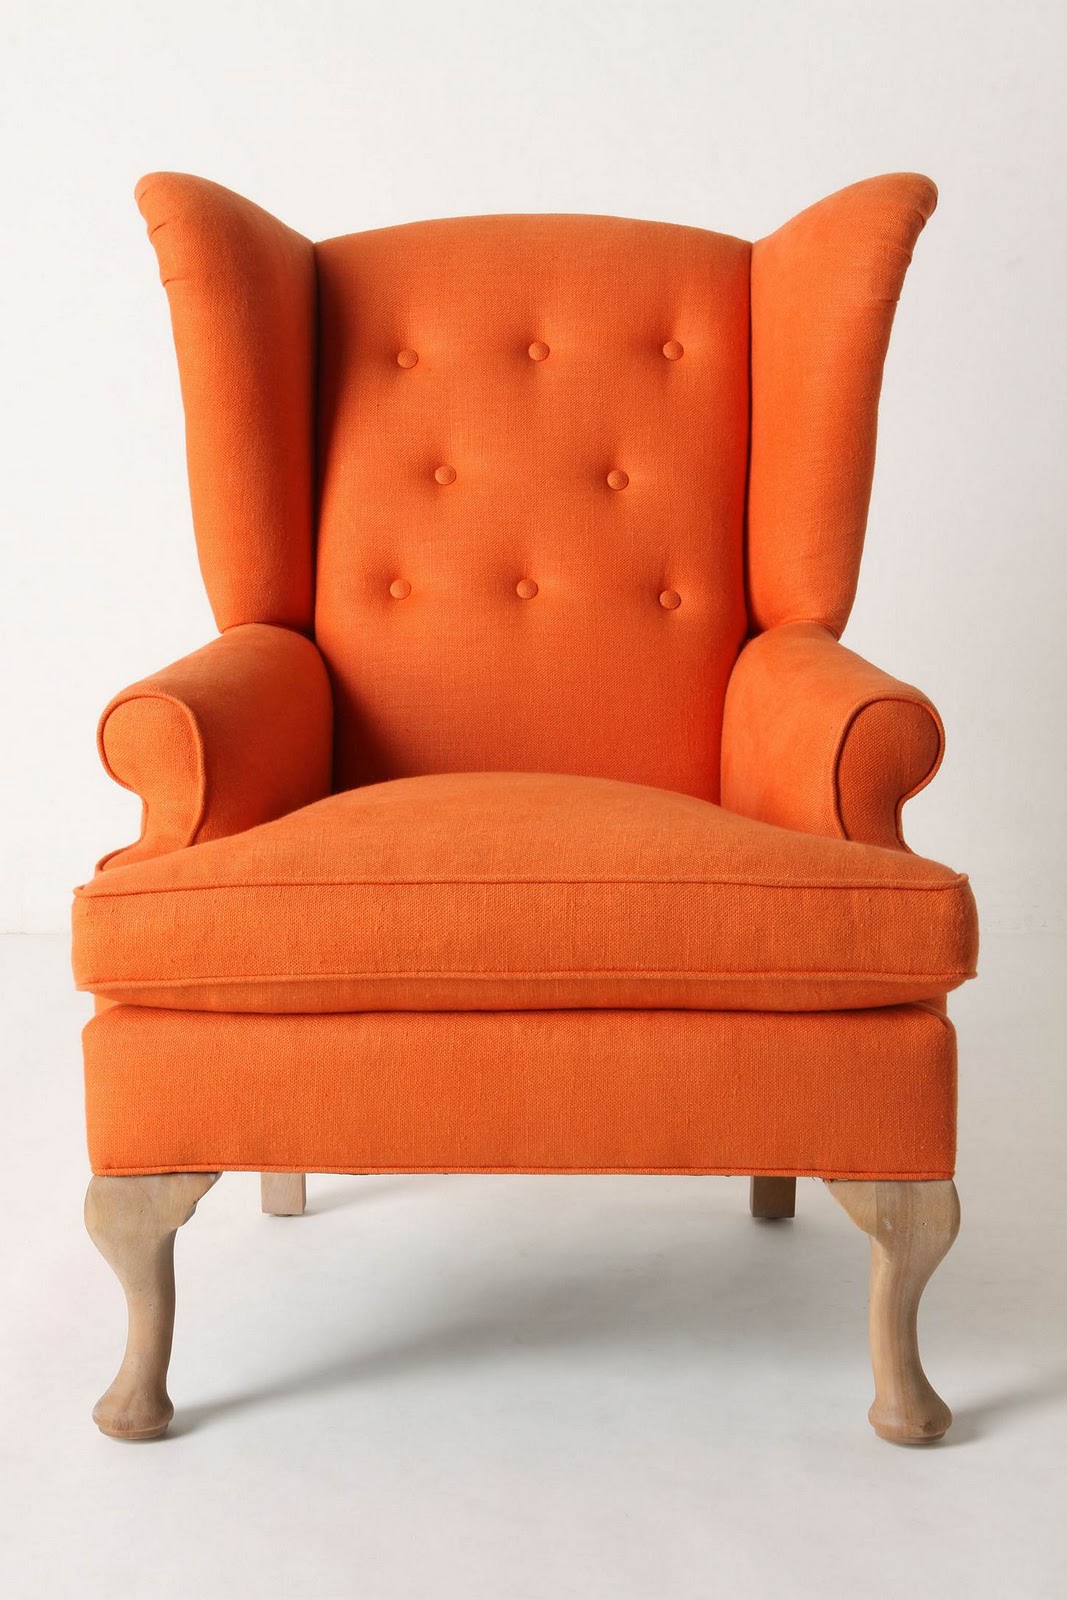
image via anthropologie

I am contemplating taking on the challenge of reupholstering a wingback chair I have.  I know - SCARY!  This chair was given to us for free and has just been sitting in a corner out of the way since it is a nasty pink color - a mix between rose and bubble gum pink - and doesn't match anything we have.

I've found quite a few tutorials on how to go about reupholstering, but wanted to know if there were any tricks or tips any of y'all have?  Maybe you've found a blog that has great instructions?  Any help would be greaty appreciated!

I've also found a few fabric websites, too - do y'all have any favorites?  I don't want to spend a ton on fabric so I need something reasonably priced since it will take about 7 yards to reupholster the chair.  Hmmm...Should I go bold a do a print?  Or keep it simple and do a solid color?  Decisions, decisions...

P.S. - Did you notice that cute little new badge on my sidebar?  That's right.  I'm a Stella & Dot Stylist :)

Tuesday, October 18, 2011

Before + After Dining Table

In the midst of all of the wedding madness I was able to find some time to paint my
dining room table - finally!  So, here are some pictures detailing this sweet little
table's journey from ugly duckling to beautiful swan...Enjoy!

Here is the before...

(Don't mind the fact that I accidentally started taking photos of it after I had already primed the base)


Poor girl needed some help.


So, help her I did and transformed her into this pretty little lady...


So much better, right?  The color is the same as my coffee table - Martha
Stewart's Sharkey Gray.  I know there are several other pieces that I need to
work on, but I won't tackle that until after our honeymoon!
Have you tranformed a piece of furniture recently?

Thursday, September 8, 2011

Wedding Bells

Well, the wedding is less than two months away (eeek)!  Most everything is taken care of
with the exception of a few small DIY projects.  I can't tell you how excited I am to marry
my best friend and the love of my life!  He is everything (and more) that any girl could ever
want in a friend, confidant and husband.  So, without further ado here are a few pictures
of some of the wedding items I've been working on and a sneak peek at a few things...


Wedding invitations (that went out this past weekend!) from minted.com
And here they are with the lovely (and non-traditional) stamps...


And take a look at this sweet koozie my wonderful friend Miranda got me!  I love it!


Below is the wedding insert I made - monogram was made on Wedding Chicks.


As far as the bridesmaids dresses go, I told my sweet girls they could pick whichever dress they
wanted in the J. Crew Silk Taffeta Collection in the color I requested - and they all ended
up picking the same dress!  Can you guess which one?  Which color do you think I went with?

I can't wait for this weekend - we have a wonderful group of friends that are throwing
us a wedding shower in the fiancĂ©'s hometown.  I am so excited to see everyone!
What are your weekend plans?